4. Sample
4.1. Sample Sources
Koala supports a multitude of input sources, such as mic, audio files, video files, input from audio interfaces and plugins when loaded aus AuV3 effect.
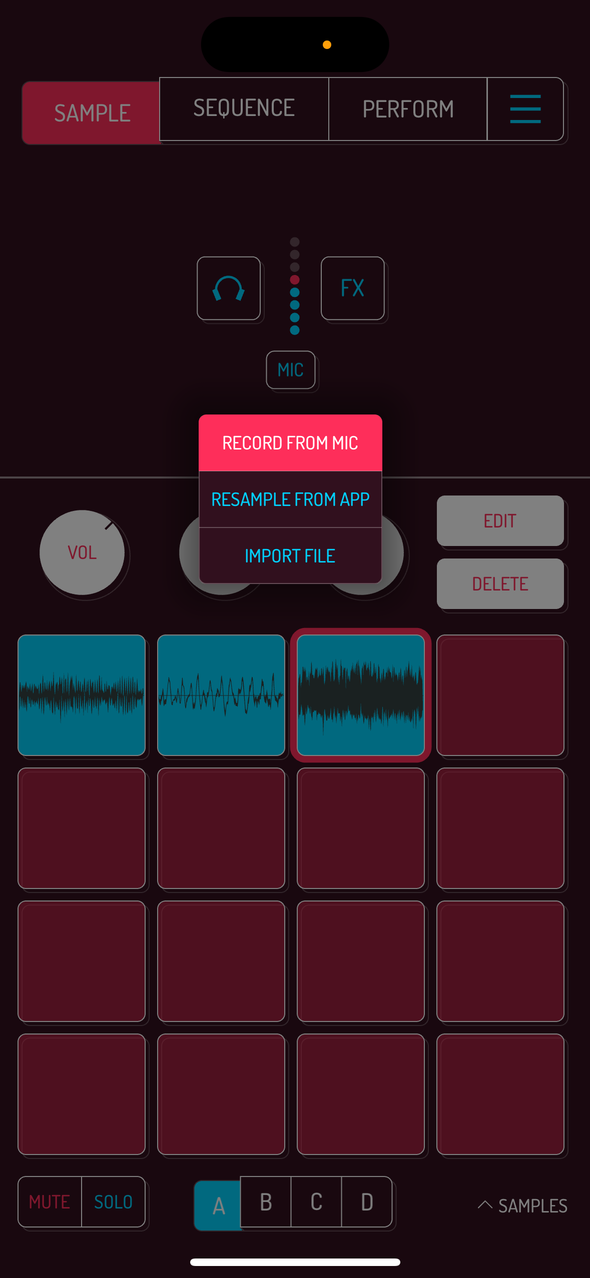
Mic input lets you record any sound captured by your device.
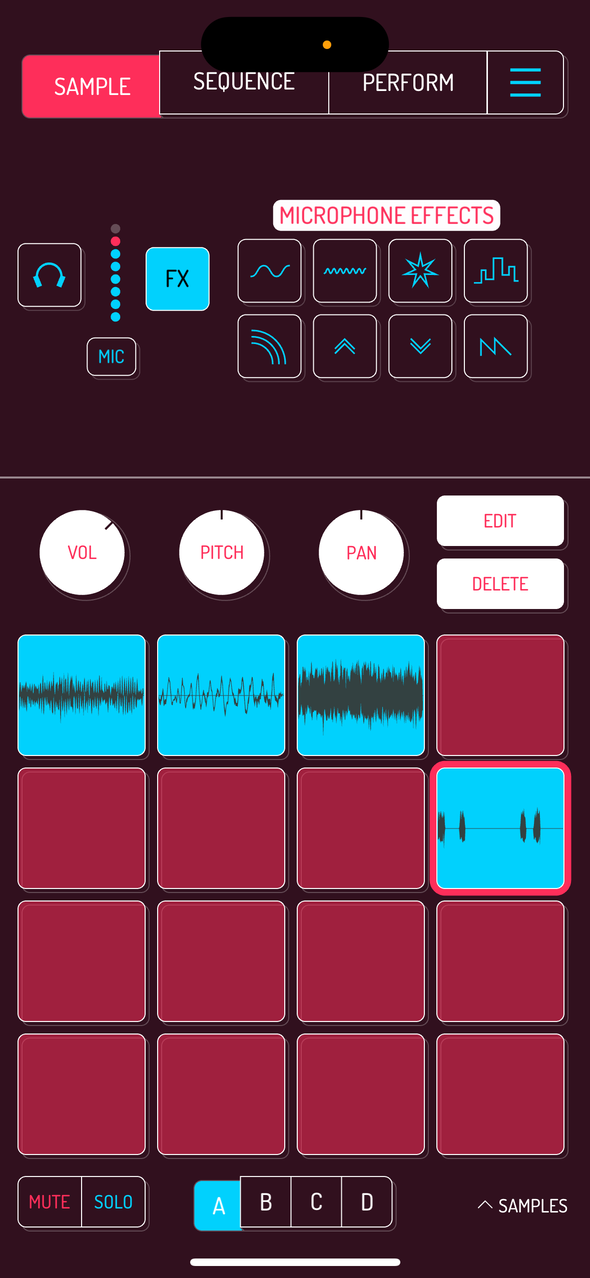
Use one of the 8 built-in input effects to mangle input sound during the recording. Following effects are available:
- More Bass: low end boost
- More Treble: mid range boost
- Fuzz: classic fuzz overdrive
- Robot: adds a robotic flavor
- Reverb: basic reverb
- 8ve Up: pitches audio 1 octave up
- 8ve Down: pitches audio 1 octave down
- Bass Synth: adds low end harmonics
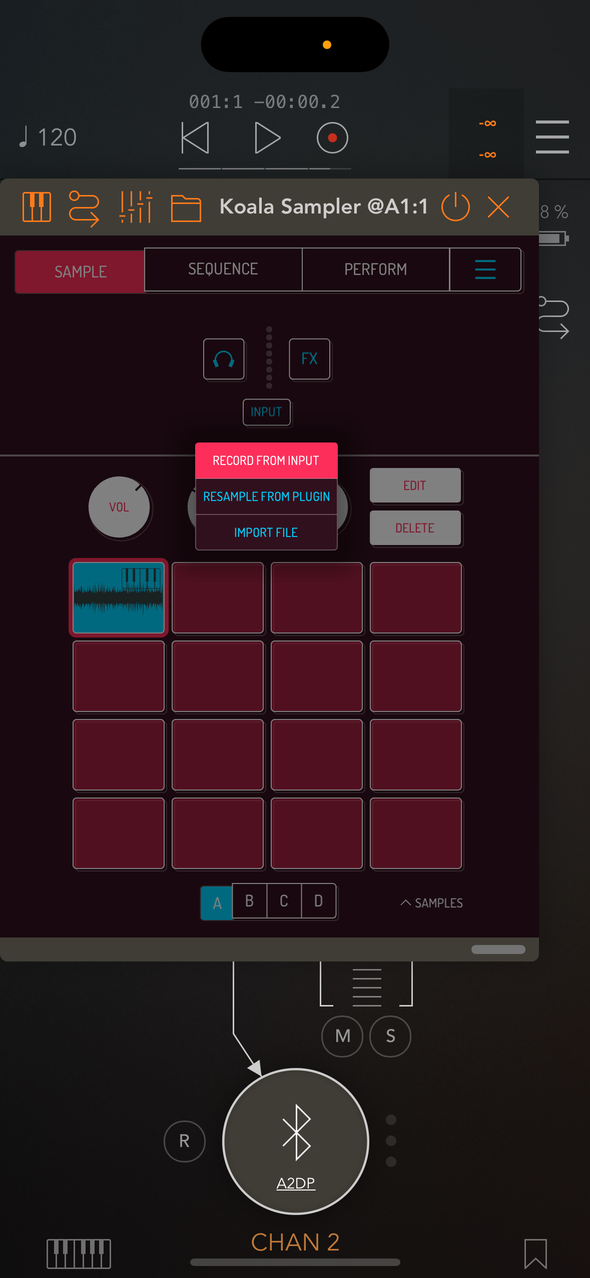
When an audio interface is connected to your device, mic input changes to Input and captures audio coming through your USB device.
When using Koala in AUv3 hosting apps like AUM, Input option captures audio routed into Koala. (Pls note, AUv3 functionality is only available on iOS)
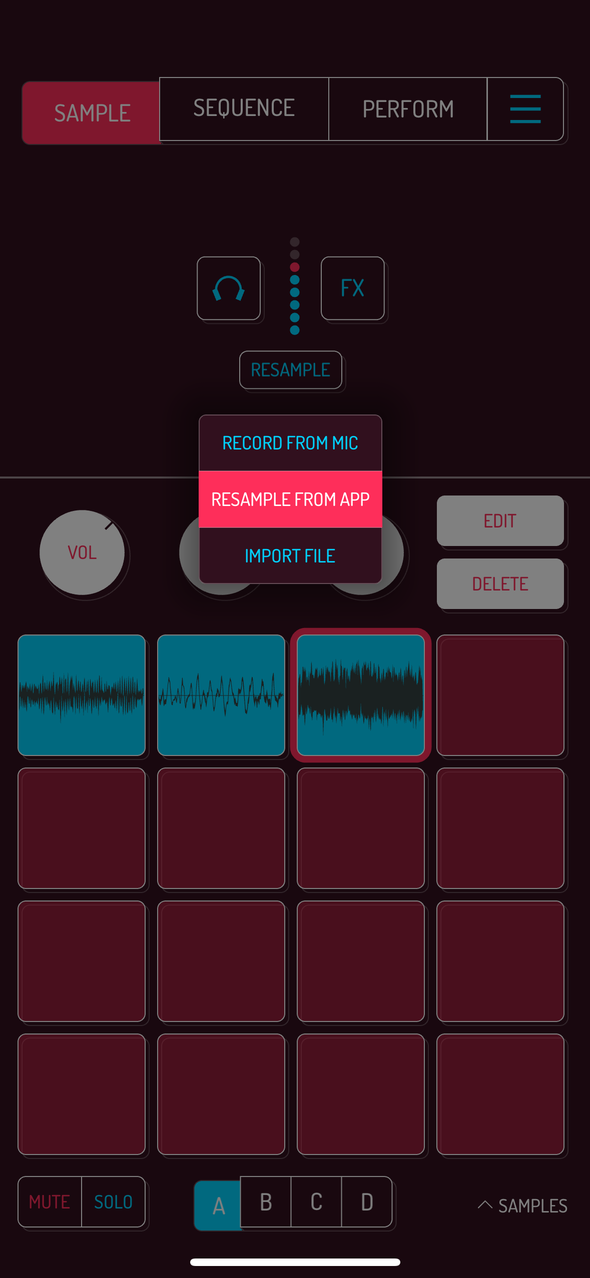
Resample from app mode lets you capture sounds within Koala. Tap any free pad to start recording, then tap other samples or play a sequence while using live effects in perform screen to capture longer passes on a single pad.
Pro tip: sequences can also be bounced to a pad with the bounce option in the main menu.
Read more about bounce options.

Select import audio to bring up file selector when tapping on an empty pad. Selected sample will then get loaded on the same pad.
Supported audio formats are whatever your OS is able to play back natively with the default media player.
4.2. Monitoring Input

Tap the Monitor button to enable input monitoring. This is helpful when Koala is capturing other instruments in AUv3 mode and will allow you to hear the instrument in the first place.
Warning: make sure to use headphones when monitoring the mic input to avoid high pitch feedback.
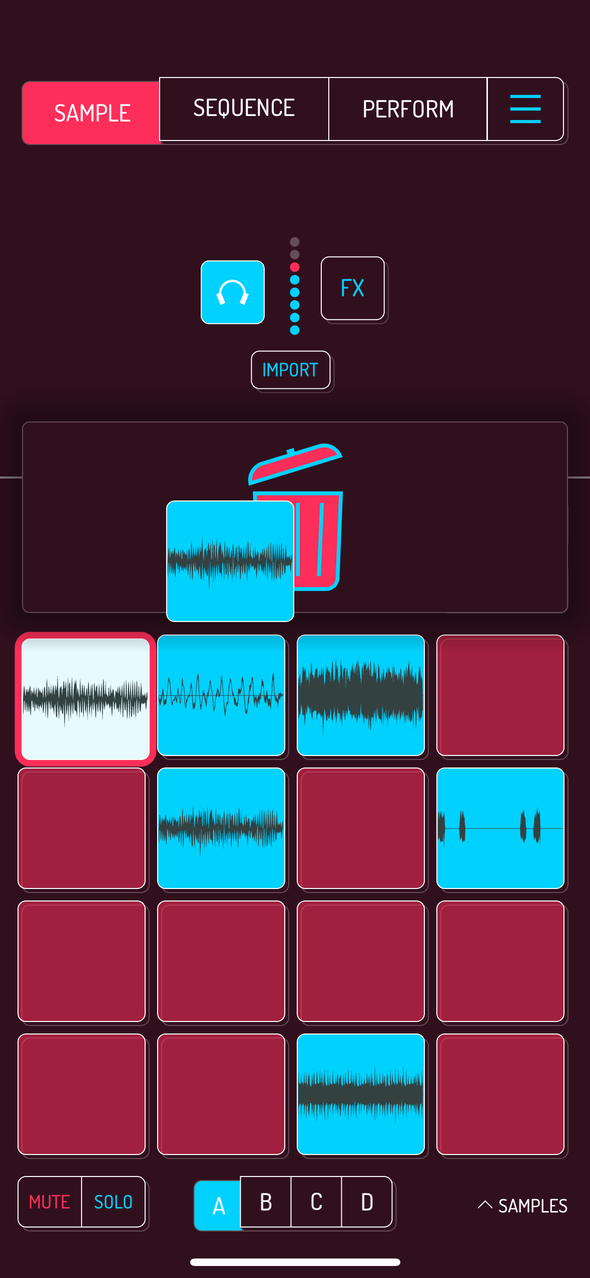
4.3. Import Audio
Koala offers several ways to load your samples. One of them is importing audio through the input source described in the previous chapter.
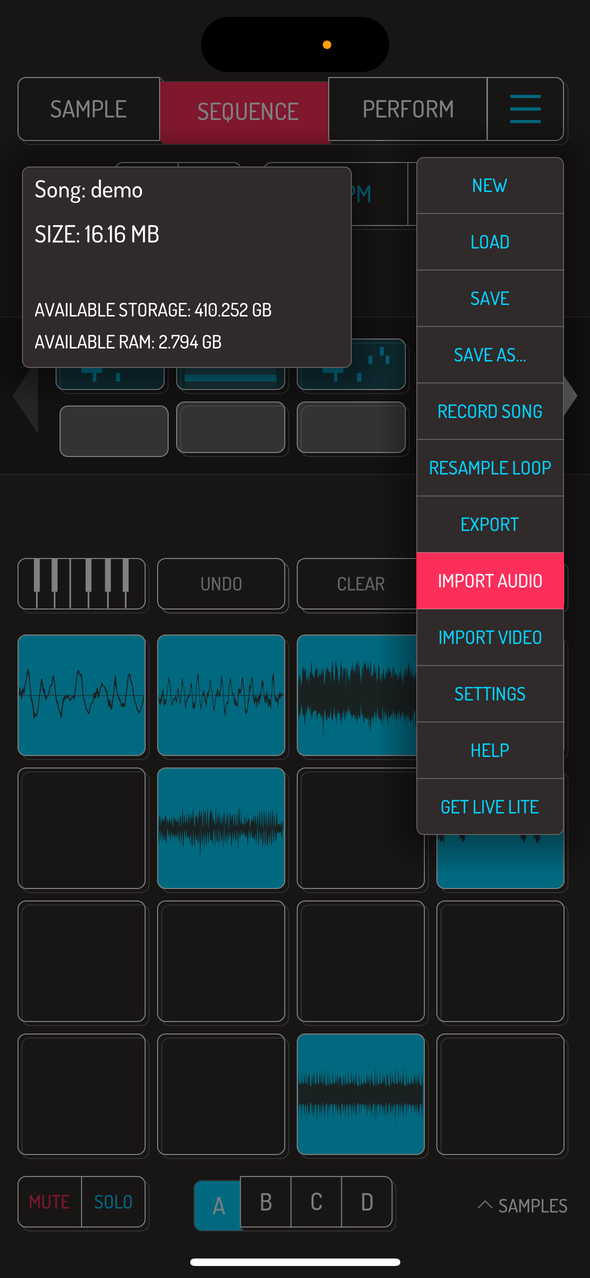
Tap on the MENU button, then choose IMPORT AUDIO. File browser appears, which lets you browse your files, preview samples and load them individually.
Tap the LOAD button in audio preview to load selected sample on the next free pad. Alternatively, drag the file to the preferred pad.
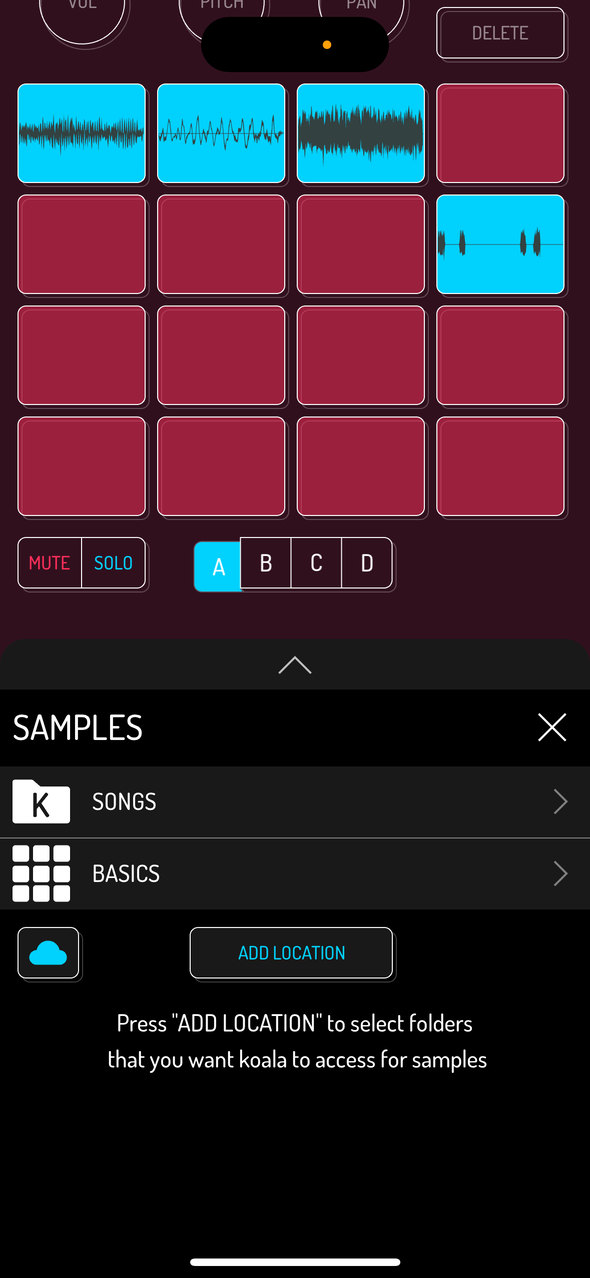
Tap on SAMPLES in the bottom right corner of the SAMPLE or SEQUENCE screen to open the samples browser.
Koala’s SAMPLES browser simplifies access your samples faster with favorite folders readily available and also load samples and whole banks from other Koala songs.
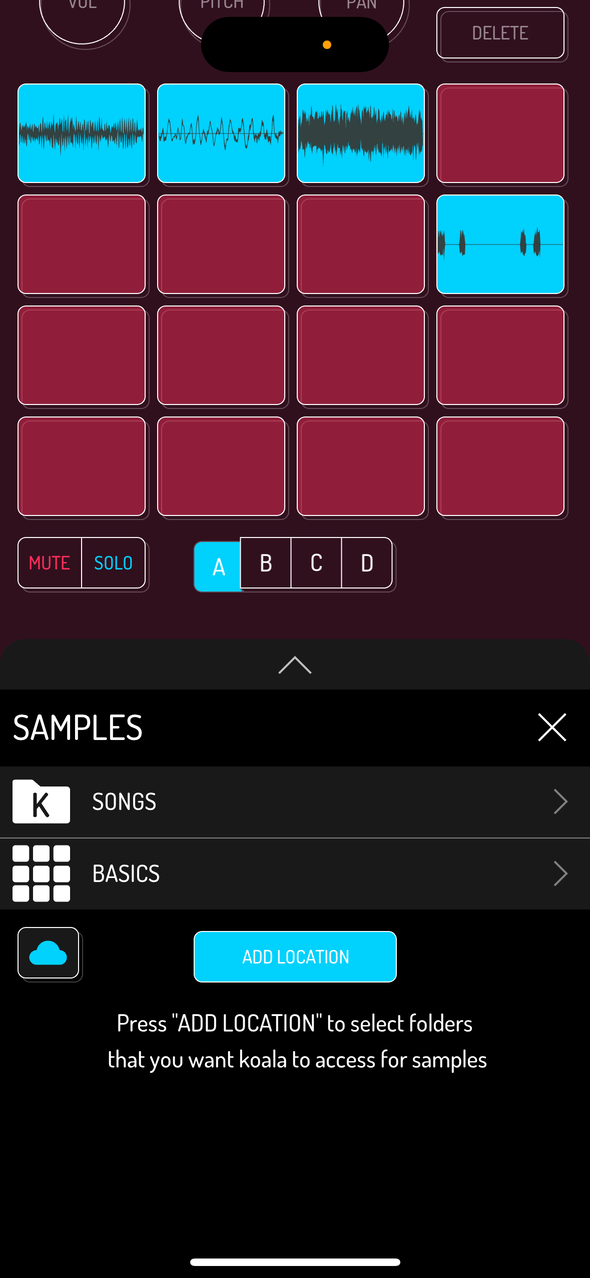
You can add any folder on your device to your favorites by tapping on the ADD LOCATION button. Tap EDIT button to remove folders from your favorites. Tap on the cloud button to open iCloud in Files app. This feature is available on all platforms except on iOS below version 14 (which is when Apple implemented in the OS)
Tap on the multi select button in the top right corner, which enables selecting and loading multiple samples in one go.

Select a koala song in the SAMPLES BROWSER to open a preview screen of that song.
- LOAD SONG loads all content: sequences and samples from all banks.
- LOAD BANK loads the selected bank of samples.
- LOAD SAMPLE loads individual samples.
Pro tip: you can drag samples over to pads in your current song.
4.4. Extract Audio From Video Files

Tap the MENU button, then choose IMPORT VIDEO. A window with videos on your device will open. Tapping on any video will open that video for preview. Tap on USE in the top right corner to extract audio and put it on the next free pad in your song.
Warning: converting videos may take a while depending on your device.
Pro tip: use the iOS screen record feature to record videos during their playback in the web browser.
4.5. Copy, Swap, Merge and Extend Pads
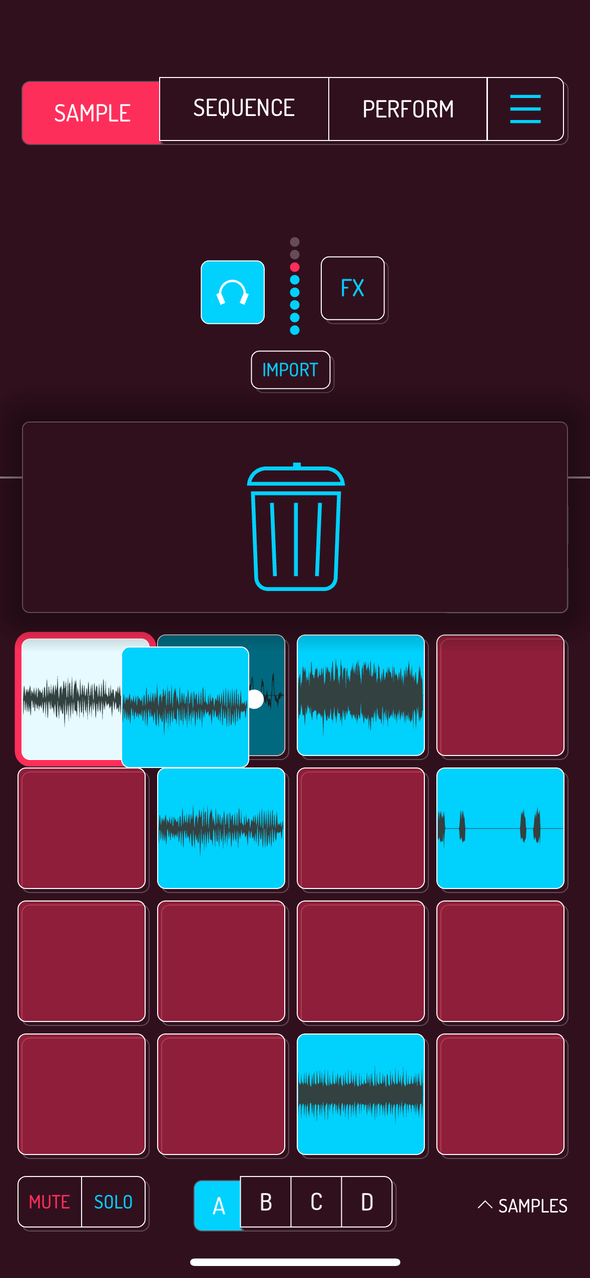
Tap and drag a pad with a sample over a free pad to copy it. If the target pad is not empty, you will be prompted to either
- merge samples of both pads
- swap samples of both pads
- add the pad you’re dragging to the end of the original pad
Merging mixes both samples, replacing the sample on the target pad. Adding to the end replaces the target pad with extended version of the sample.
Note : All parameters you set on both samples are baked in when merging and extending them.
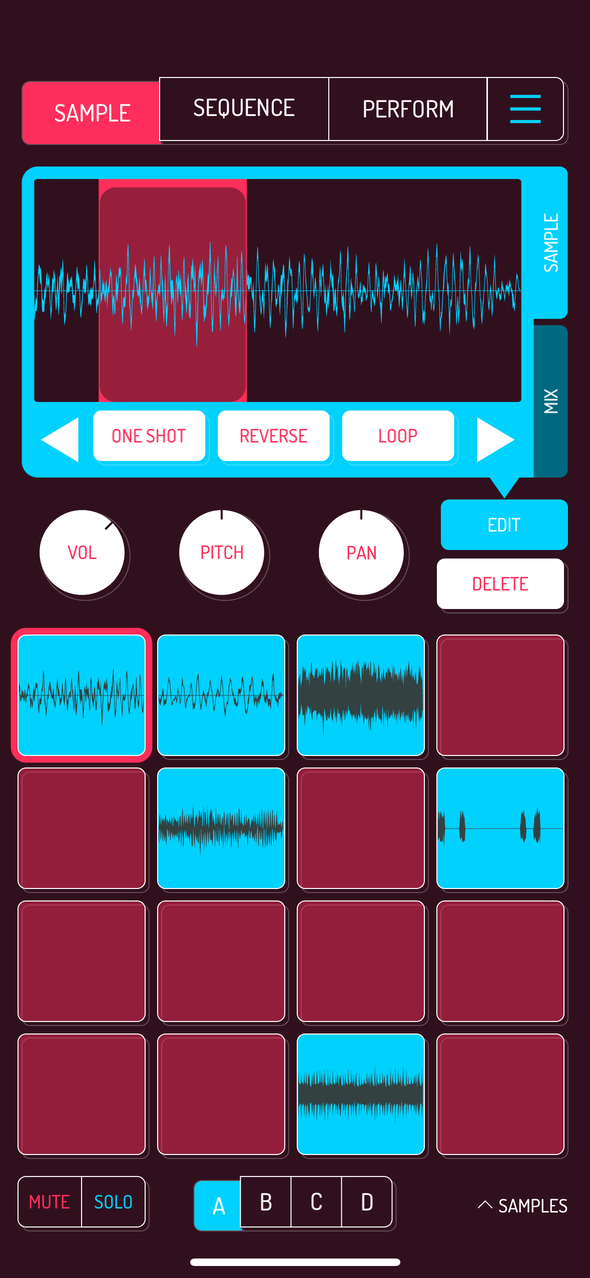
4.6. Sample Controls: Volume, Pitch, Pan, Edit, Delete
Pro tip: tap and hold the EDIT button, then tap all the pads you want to tweak. Changes to the VOL, PITCH, PAN and sample editor controls will be applied to all selected pads.
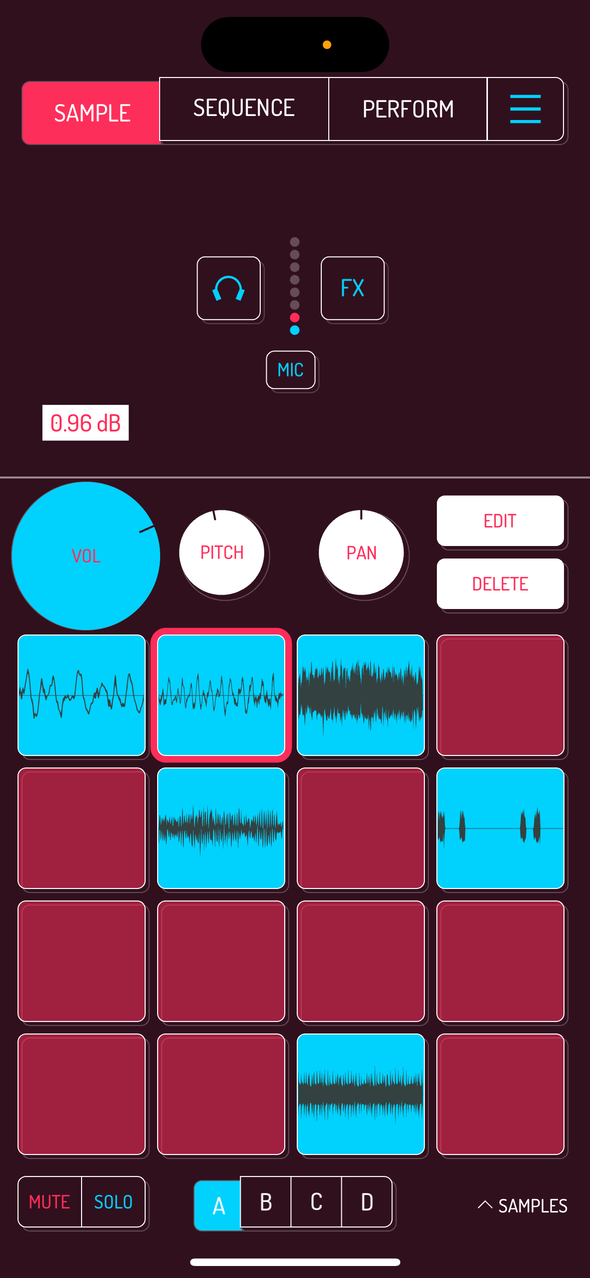
Hold VOL and slide in any direction to change the volume of your sample. Tap twice to reset back to the original volume of the sample.
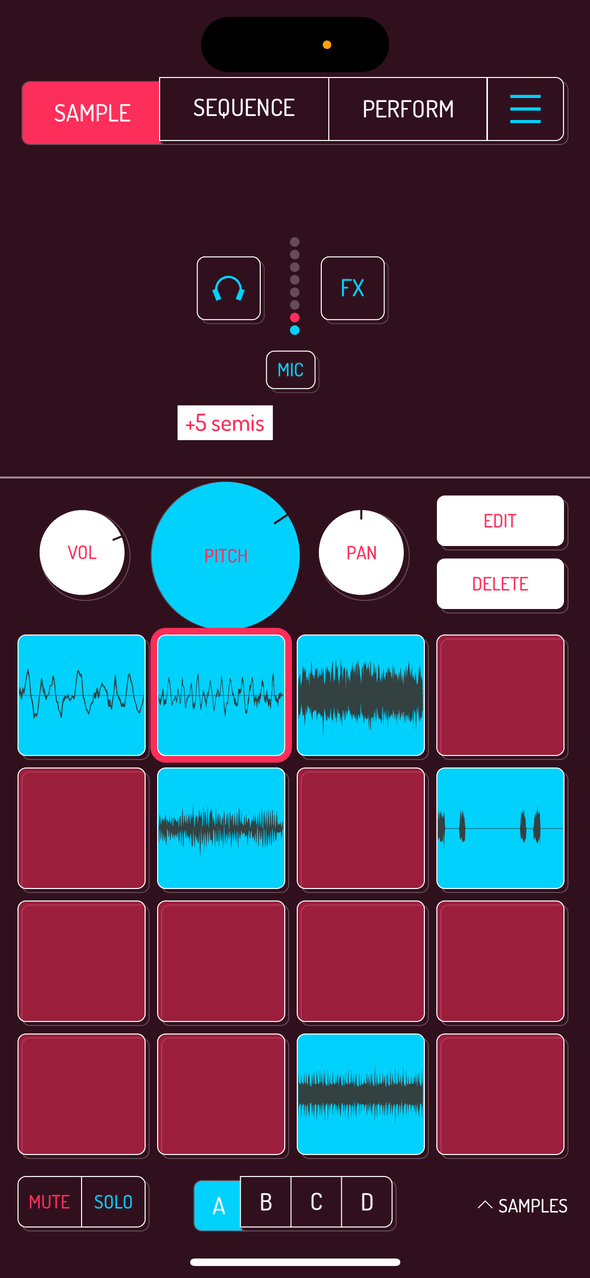
Hold PITCH and slide in any direction to change the pitch of your sample. Tap twice to reset back to the original pitch of the sample.
Pitch adjustment can be changed from fine tuning to full semitones in general settings.
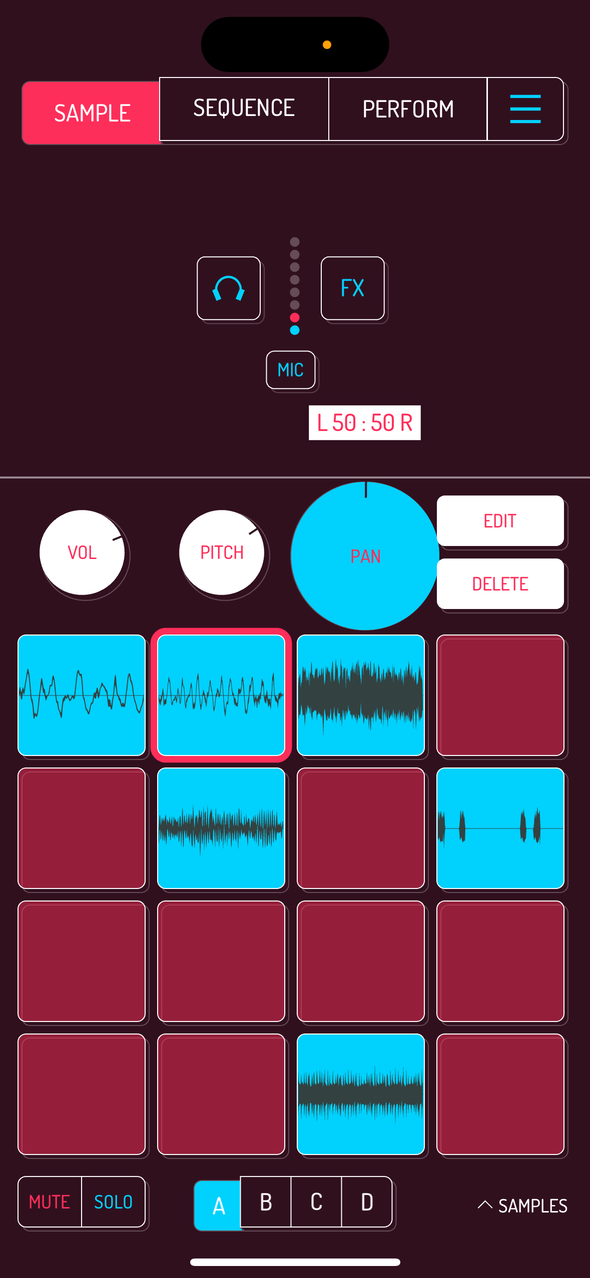
Hold PAN and slide in any direction to change the panning of your sample. Tap twice to reset back to center.
Tap DELETE to erase the currently selected sample. A confirmation window will open. Tap OK to confirm.

Hold DELETE and tap pads you want to delete without confirmation.
Pro tip: drag any sample up into the trash area that appears when dragging samples.
4.7. Sample Editor
Sample editor offers additional tools for playback, manipulation and adjustments of your samples. When used on phones, buttons are spread over 3 pages. Tap on arrow buttons to switch between the pages.

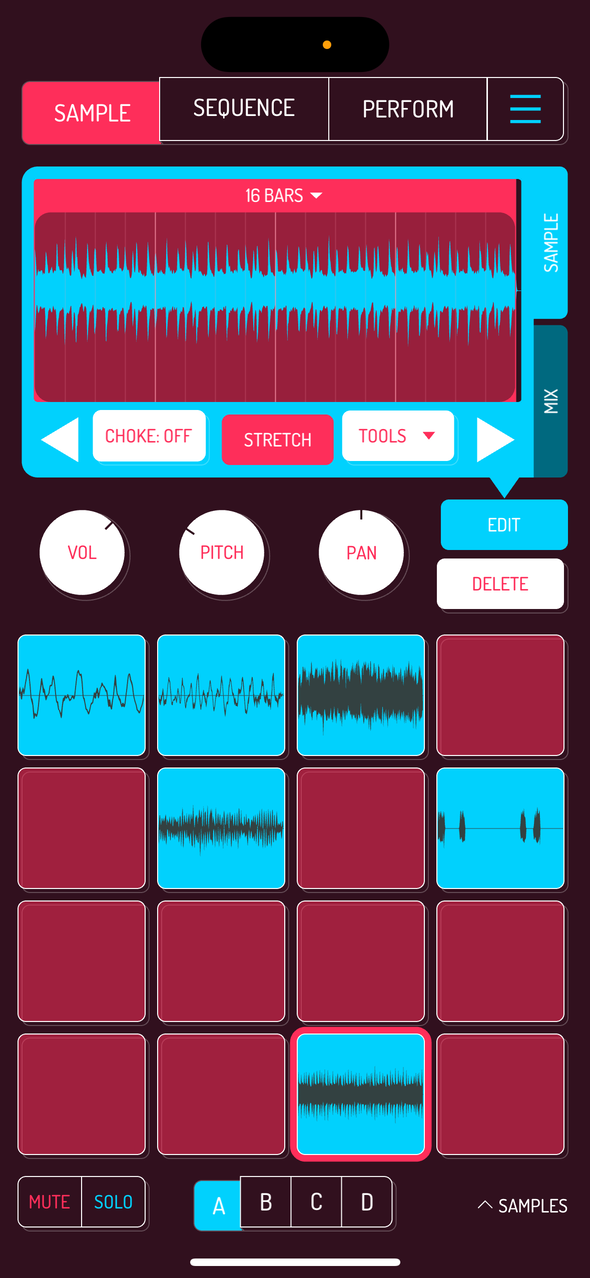
Open the sample editor by tapping either the EDIT button. Main area is the waveform of your sample with controls below.
Drag the left and right corners of the highlighted red area to determine the beginning and end of the playback.
Pro tip: select a single waveform and activate looping to make your own sample based synthesizer. Try playing the pad in chromatic mode to create melodies with it. Read more on chromatic keyboard mode.
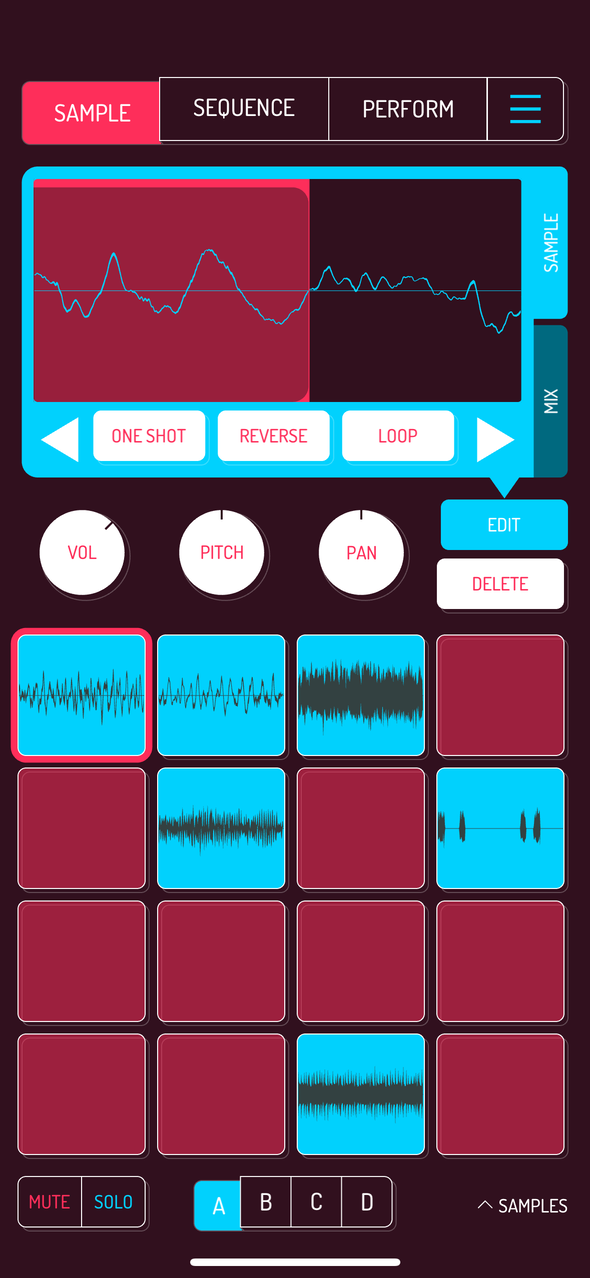
Zoom in and out the waveform by pinching within the waveform area.
Pro tip: Zoom out and drag while holding the top stripe of the selected area to move it around.

ONE SHOT: enables/disables one shot playback. When turned on, sample plays through on tap. Off means sample plays back as long as you press it.
Pro tip: One shot mode can be set by default in the settings.
REVERSE: reverses the playback of the sample
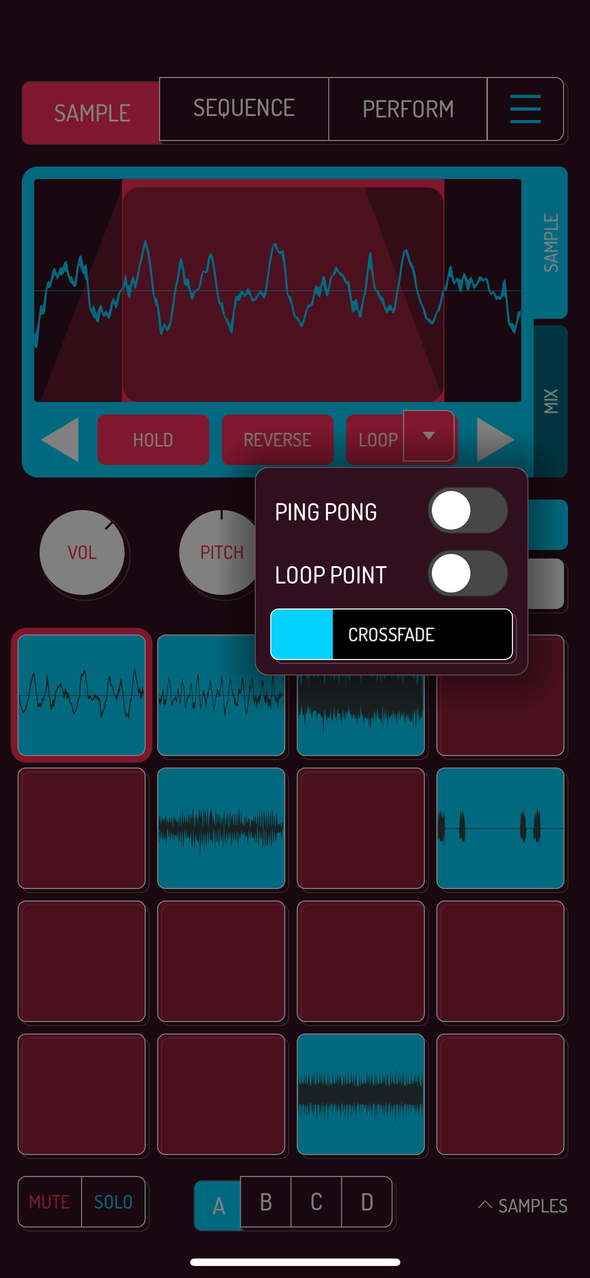
- LOOP: activates looping of the sample with three modes available.
- PING PONG loops front to back and then back to front.
- LOOP POINT creates an additional marker determining the beginning of the loop.
- CROSSFADE determines the amount of fade out and fade in at the borders of the loop.
Note: When LOOP is activated, ONE SHOT button changes to HOLD. Hold setting means pad playback is activated with a single tap and stops when you tap it again.
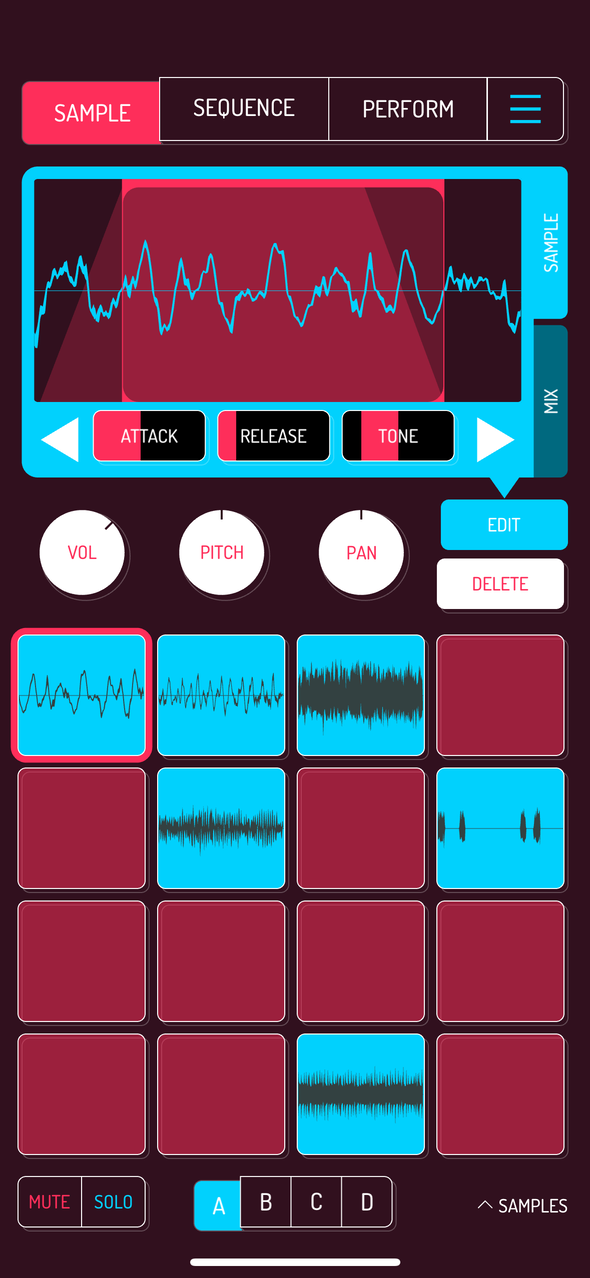
ATTACK: adds an attack envelope, making the sound fade in when played
RELEASE: adds a release envelope, making the sound fade out when released
TONE: add a low pass filter to the left of the center and a high pass filter to the right of the center
Pro tip: play with ATTACK and RELEASE while LOOP is engaged to get additional motion in your chops.

CHOKE: adds selected sample to one of the 6 choke groups, choking any other sample playing back in the same group. Try choke groups with open and closed hi hats.
STRETCH [SAMURAI]: activates time stretching for the sample. Read more. STRETCH is only available in SAMURAI, an in-app purchase.
Pro tip: tap and hold EDIT, then select all the pads you want to tweak. Control changes will be applied to all selected pads.
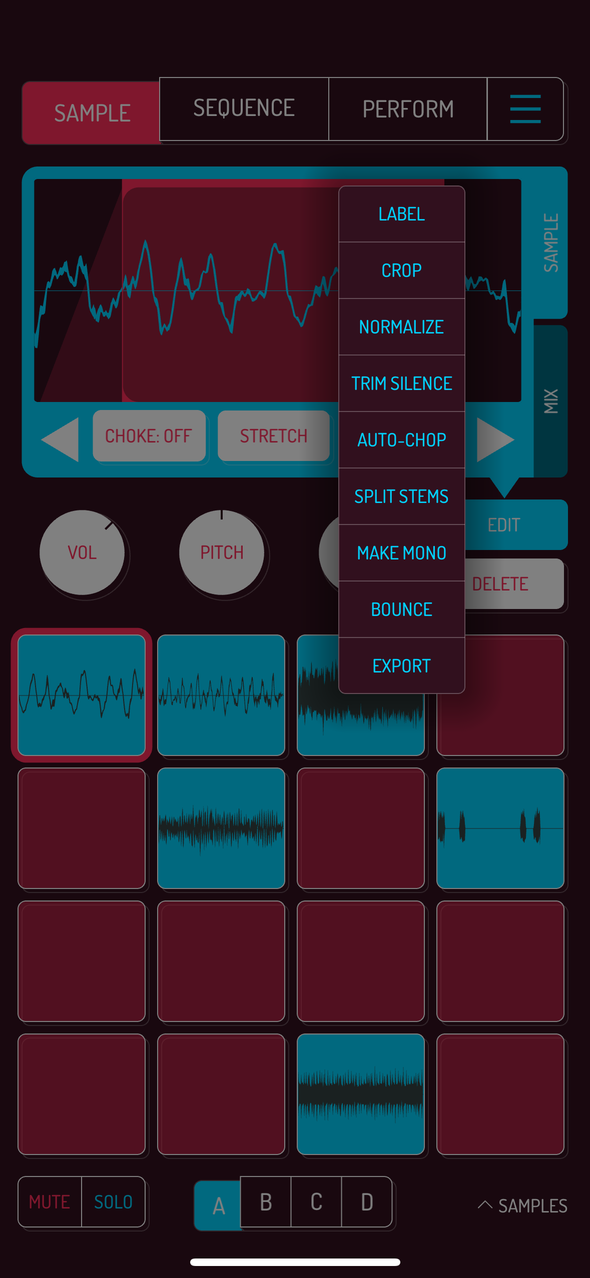
TOOLS: opens a dropdown menu with additional tools
- LABEL: add a custom label to the pad
- CROP: trim the sample to selected area
- NORMALIZE: normalizes the sample to 0 dB
- TRIM SILENCE: removes silence from the beginning and end of the sample
- AUTO-CHOP [SAMURAI]: divide sample into chops. Read more about SAMURAI add-on
- SPLIT STEMS: separate stems into drums, vocals, bass and other instruments. Read more
- MAKE MONO: convert sample from stereo to mono
- BOUNCE: save selected area to a new pad
- EXPORT: export sample as WAV file
4.8. Mix and EQ

To see the MIX tab, activate “Show EQ” in SETTINGS. Read more.
Tap on the MIX tab to switch to the 3 pole EQ screen for the currently selected pad.
Each pad can have individual EQ settings. Tap and drag one of the three poles to adjust their settings. Spectrogram of the sample will be shown when the pad is played back.
Pro tip: Use multi-select by tap holding EDIT button, then selecting all pads you want to adjust. EQ settings will be applied to all selected pads.
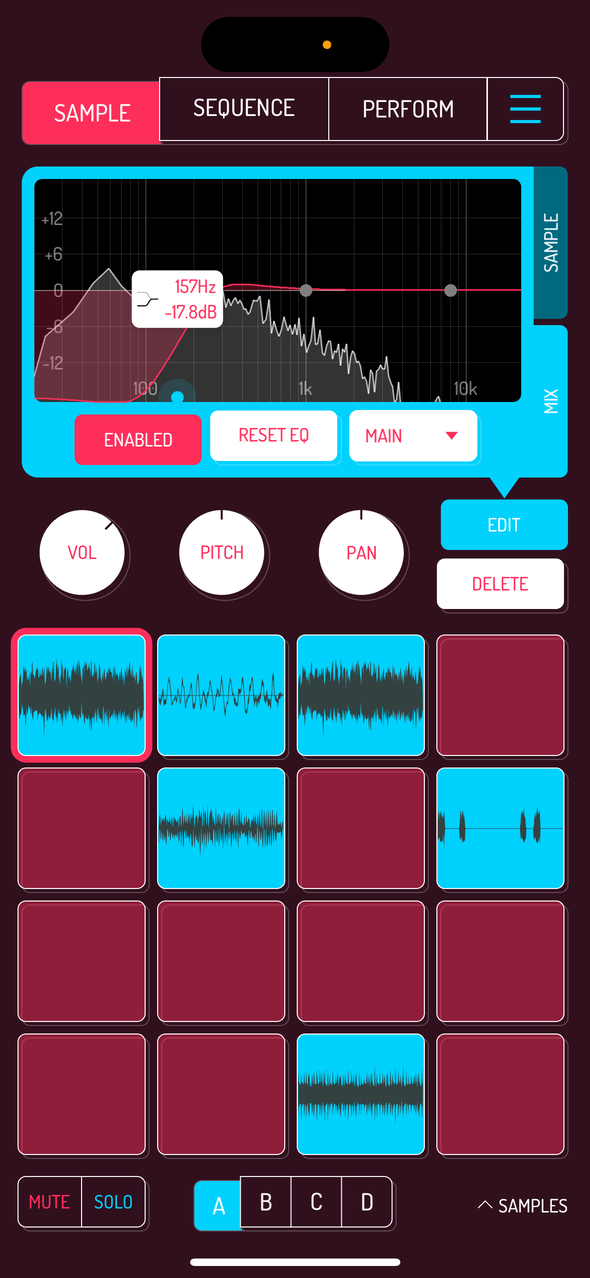
Left pole is a low shelf filter that changes to high pass when dragged to the bottom of the spectrum.
Middle pole is a bell filter which acts as a notch filter with extreme Q setting.
Right pole is a high shelf filter that acts as a low pass filter when dragged to the bottom of the spectrum.

Double tap, then swipe up or down to change the Q width of the pole. Swiping up widens the Q, swiping down narrows it.

Tap ENABLE button to activate EQ. Great for making A/B comparisons of your changes to the EQ.
Tap RESET to reset back to neutral position.
Tap the BUS button to determine which BUS the pad is sent to. BUS button is part of the MIXER in-app purchase. Read more.
4.9. Chopping Samples
Auto-Chop is available in SAMURAI mode, an in-app purchase.
Koala offers several modes to chop your samples. Tap on AUTO-CHOP in the TOOLS dropdown to open the chopping window.
Pro tip: change the volume, pitch, panning, tone, stretch and reverse settings of your sample as needed before entering AUTO-CHOP. Chopping is applied to a resampled version with those settings baked in.

Use TRANSIENTS to automatically chop by transients within your sample. This mode is useful for shorter samples and drum breaks. Reduce or increase the amount of chops by swiping within the chops bar. The chops bar turns red if there are not enough free pads for the current amount of chops.
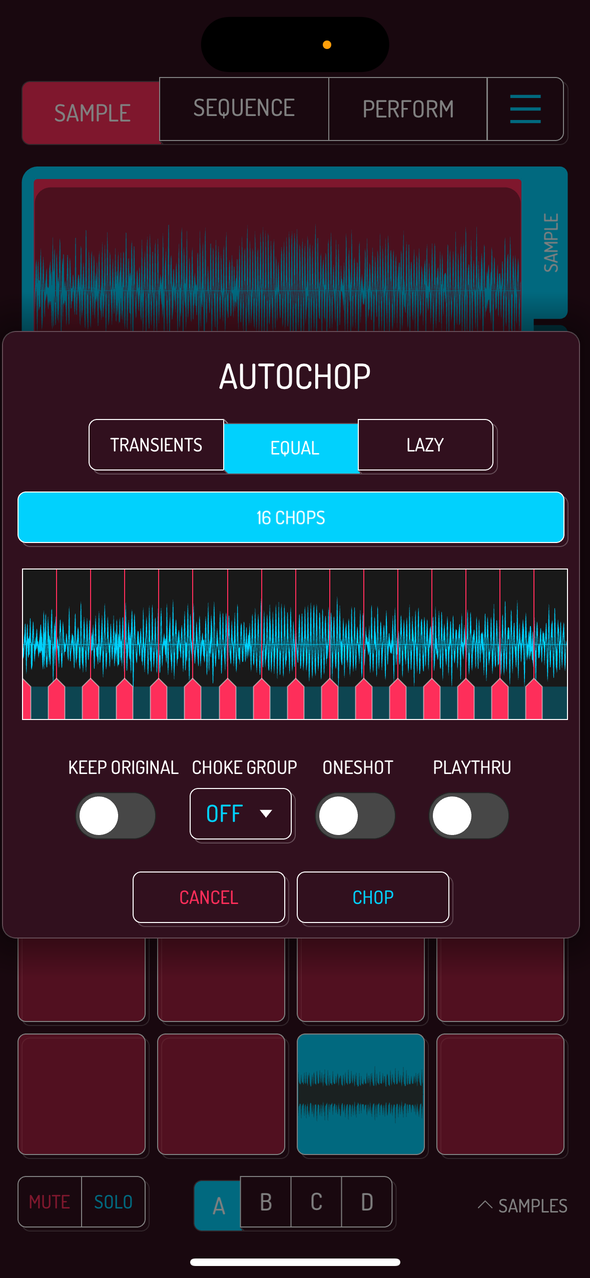
Use EQUAL mode to chop the sample into equal parts. This mode is useful when chopping loops or breaking a longer sample down into smaller chunks. Swipe the chops bar to increase or decrease the number of chops.
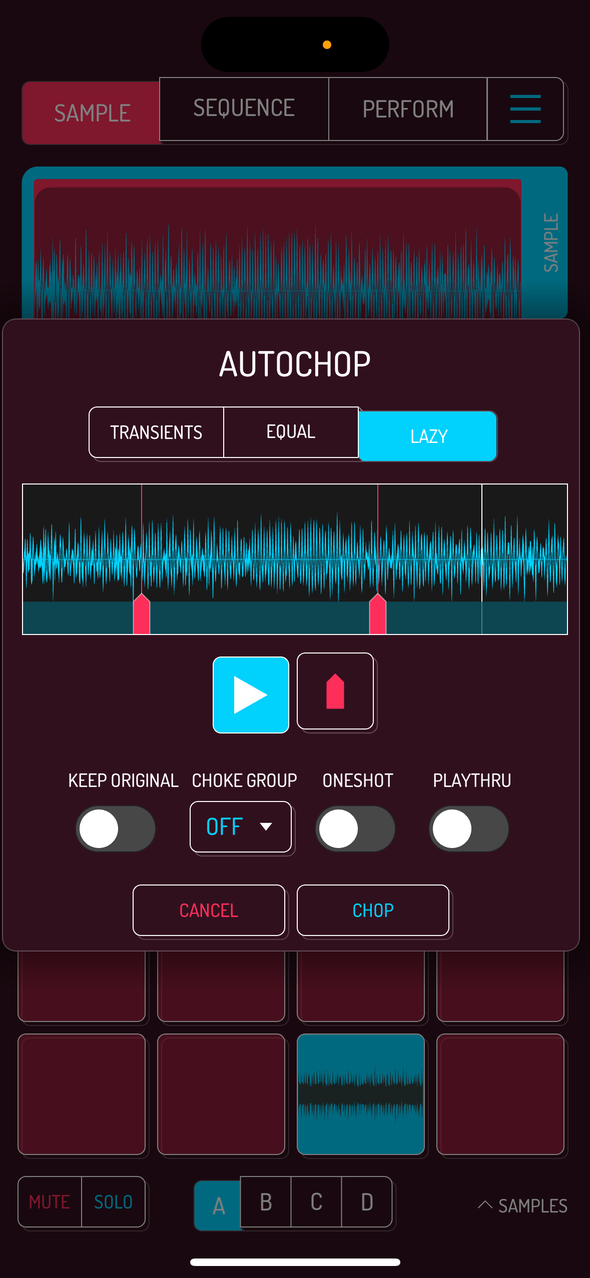
Use LAZY mode to use the MPC style of chopping, placing chop markers during the playback.
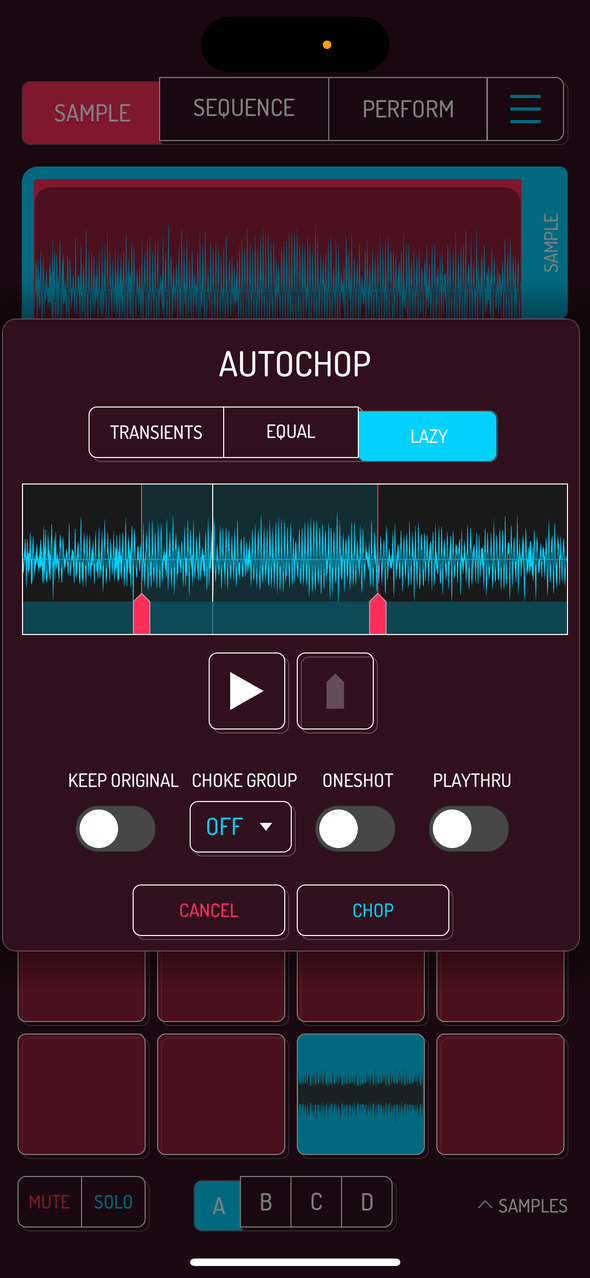
Tap the waveform to preview the chops.

Drag the markers at the bottom to change their starting points. Tap anywhere in the blue stripe below the waveform to add chop markers.
KEEP ORIGINAL: turn on if you want to keep the original sample. It will be replaced by the first chop when off.
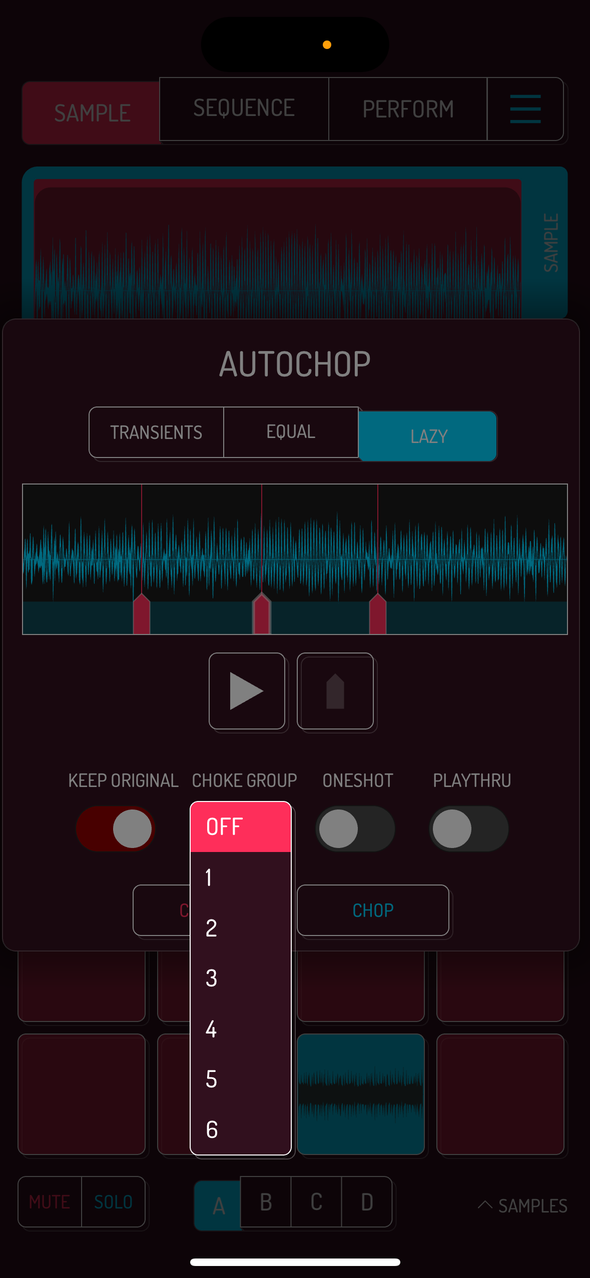
CHOKE GROUP: adds all chops to the selected choke group
ONESHOT: set all chops to ONESHOT mode
PLAYTHRU: set the endpoint for all chops to the end of the sample. When off, chops start at their marker and stop at the next marker.
4.10. Split Stems
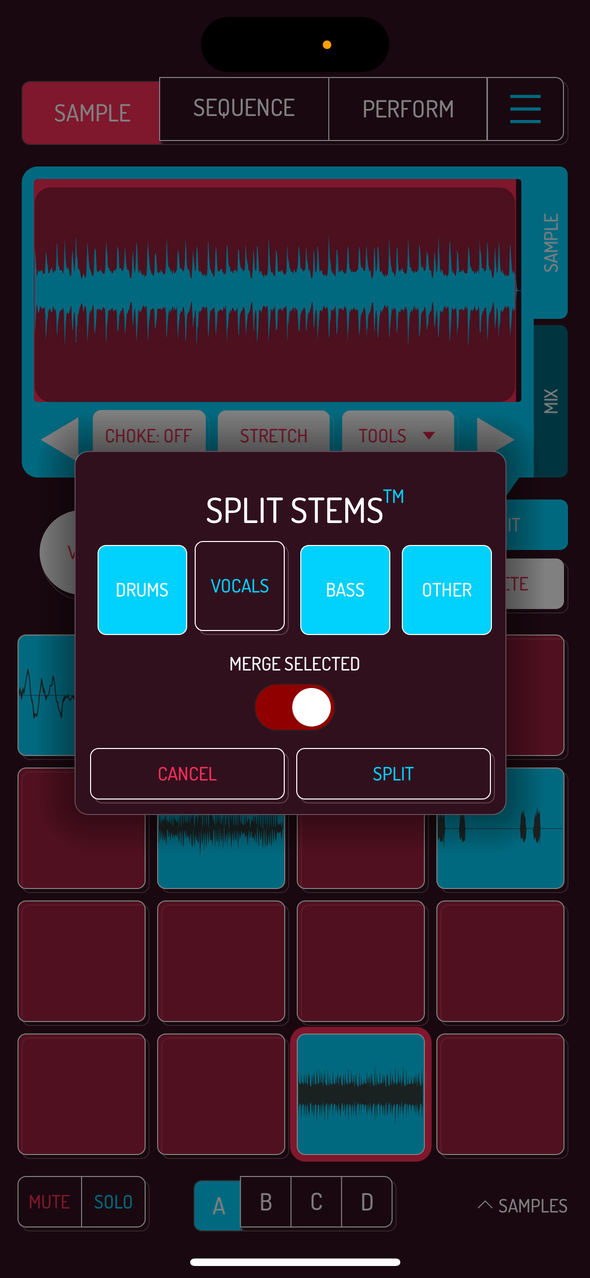
SPLIT STEMS is a powerful stem separation feature which allows extracting up to 4 stems from your sample.
Note: This feature is not active by default, as it requires 150 MB of additional space on your device.
SPLIT STEMS is only available in standalone mode.
Read how to activate stem separation in general settings.
4.11. Time Stretching
STRETCH is available as in-app purchase SAMURAI. Read more.
Tap on STRETCH to activate time stretching. Top bar of the sample selection shows the number of bars and the playback of the sample is locked to the song’s tempo.
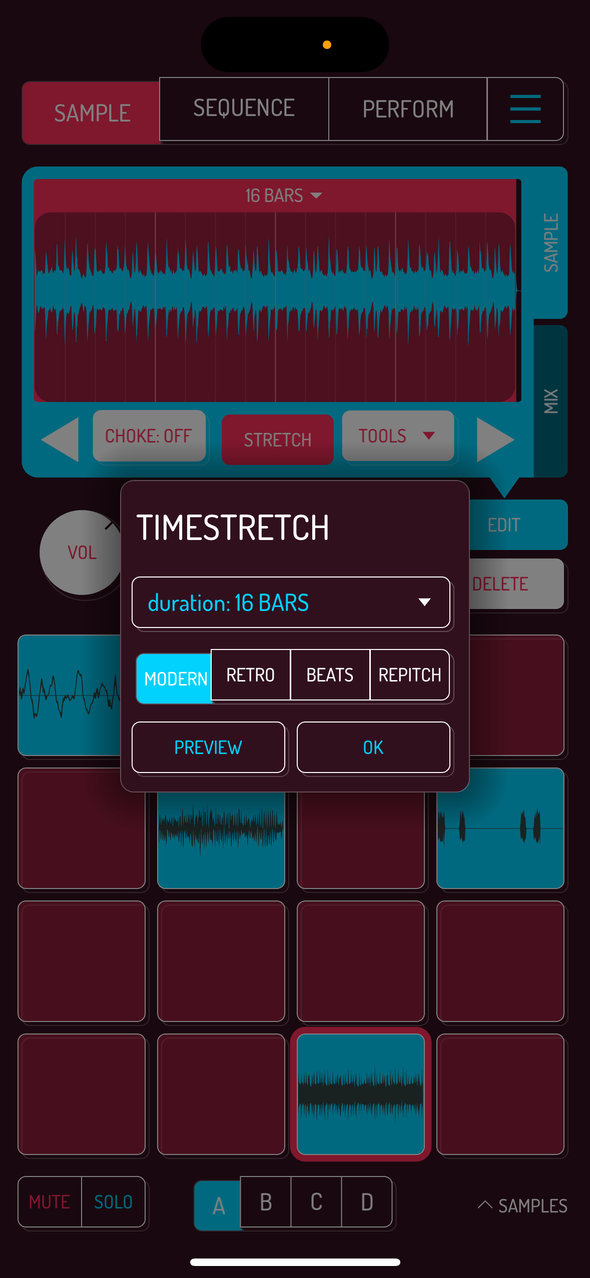
Tap on top of the selected area with the number of bars to change the duration of playback. Select one of the four stretching modes: MODERN, RETRO, BEATS and REPITCH. Every mode has its distinct sound. BEATS mode is particularly useful when stretching drum loops.
Note: every mode except for MODERN can be played chromatically. Read more about keyboard mode.
Pro tip: using long durations on short selections creates interesting ambient sounds. Create your own granular sounding synth by playing stretched pads in chromatic mode. Read more on chromatic keyboard mode.
4.12. Mute and Solo

Image: mute and solo buttons
To see mute/solo buttons, activate them in the SETTINGS. Read more.
A sequence must be playing back in order to hear mutes and solos.
Tap MUTE, then tap pads you want to be muted during the sequence playback.
Tap SOLO, then tap the pads you want to solo during the sequence playback.
